Maintaining Your Salt Chlorine Generator And Pool Water Chemistry: The Pro's Guide to Sparkling Perfection
There's nothing quite like the silky embrace of a salt water pool. Forget red eyes and skin irritation; with a salt chlorine generator, you're essentially getting the benefits of a chlorine pool without constantly hauling and adding harsh chemicals. Your generator works its magic, converting dissolved salt into a steady stream of chlorine, keeping your water clean and inviting. But just like any sophisticated system, your salt pool and its chemistry require a specific kind of love and attention to perform at their best.
Maintaining your salt chlorine generator and pool water chemistry isn't about guesswork; it's about understanding a few core principles and establishing a consistent routine. Get it right, and you'll enjoy season after season of pristine, comfortable swimming. Ignore it, and you'll face the dreaded high pH, calcium buildup on your precious salt cell, and a less-than-sparkling oasis. Ready to become a salt pool pro? Let's dive in.
At a Glance: Your Salt Pool Maintenance Checklist
- Add Salt Wisely: Get salinity right (2,700-3,400 PPM) once or twice a year, or after dilution.
- Circulation is Key: Run your pump and filter at least 8 hours daily for even distribution.
- Fight Buildup: Rinse splash-out areas, avoid calcium-based shocks, and watch for scale.
- Inspect Your Salt Cell: Check every 3 months for calcium buildup and clean when necessary.
- Master Water Balance: Prioritize weekly pH and chlorine tests, and monthly salinity, alkalinity, CYA, and calcium hardness checks.
- Shock & Sanitize: Use the generator's "boost" or a dichlor shock weekly to refresh chlorine.
- Clean Consistently: Skim, brush, and vacuum every week to remove debris.
Why Salt Water Pools Demand Specific TLC
Many new salt pool owners believe they can "set it and forget it." While salt chlorine generators automate chlorine production, they introduce unique dynamics to your pool's chemistry. The very process of converting salt to chlorine naturally elevates your pool's pH, making regular pH management crucial. This higher pH, if unchecked, can lead to calcium scale buildup on your generator's cell plates – the heart of your system.
So, while you might add less chlorine by hand, you'll be more attentive to pH levels and the physical condition of your generator's salt cell. Understanding these distinctions is the first step toward becoming a confident salt pool owner, ensuring your investment pays off in crystal-clear water and effortless enjoyment.
The 7 Pillars of Salt Water Pool Perfection
Effective salt water pool maintenance boils down to seven key areas. Tackle these consistently, and you'll keep your pool inviting and your equipment humming efficiently for years to come.
1. Getting Your Pool's Salinity Just Right
Think of salt as the fuel for your generator. Without the correct amount, it can't produce chlorine efficiently. Unlike chlorine, salt isn't consumed by the sun or pool activity; it's recycled by the generator. This means you typically only need to add salt once or twice a year, or after events that dilute your pool water, such as heavy rain, significant splash out, or when adding large amounts of fresh water.
The Sweet Spot for Salinity: Most salt chlorine generators prefer a salinity level between 2,700 to 3,400 parts per million (PPM), with 3,200 PPM often cited as ideal. However, your owner’s manual is your ultimate guide, so always double-check its recommendations. Maintaining this range ensures your generator operates effectively without undue stress.
How to Add Salt (and Do It Right):
Adding salt is a straightforward process, but timing and method matter.
- Preparation is Key: Start by turning on your pool's filter system. This ensures the water is circulating, which will help dissolve the salt evenly.
- Pour Slowly: Add pool salt directly into the deep end of your pool. Avoid dumping it all in one spot; spread it out to prevent it from clumping on the bottom.
- Brush to Dissolve: Use a pool brush to gently push the salt around the bottom of the pool. This agitation helps it dissolve faster and prevents it from settling.
- Circulate for Distribution: Keep your pump and filter running for at least 24 hours after adding salt. This extended circulation period is critical for achieving an even distribution of salinity throughout the entire pool.
- Test and Verify: After 24 hours, use a reliable test kit or digital salinity tester to check the salt levels. If they're within the recommended range, you're good to go.
- Activate Your Generator: Only turn on your salt chlorine generator once your salinity levels are confirmed to be correct. Operating it with too little or too much salt can damage the cell.
Pro Tip: It's easier to add more salt than to remove it. If you're unsure how much to add, err on the side of caution and add slightly less than calculated, then retest and add more if needed. For a 20,000-gallon pool, an initial addition might be around 568 pounds (that’s about fourteen 40-pound bags), but always calculate based on your current salinity and pool volume.
2. Keep Things Flowing: The Power of Proper Circulation
Beyond dissolving salt, proper water circulation is fundamental to a healthy salt water pool. Your pump and filter system are the unsung heroes, pushing water through the filter and, crucially, through your salt chlorine generator.
You should run your pump and filter for at least 8 hours a day. This consistent flow prevents areas of high salt concentration (which can happen if salt sits undissolved) and ensures that the chlorine produced by your generator is evenly distributed throughout the entire pool. Good circulation also helps move debris towards your skimmer and main drain, reducing the workload on your cleaning efforts.
Periodically, especially after adding salt, verify consistent salt levels throughout the pool using a test kit. This confirms that your circulation system is doing its job and distributing the salt effectively.
3. Battles Against Buildup: Preventing Erosion and Calcium Scale
Salt water pools, while beneficial, introduce certain challenges that require proactive measures. Two major concerns are erosion caused by splash-out and the dreaded calcium buildup.
Protecting Your Surroundings from Splash Out:
When swimmers splash, salty water can land on surrounding surfaces like coping, decks, and even automatic pool cover tracks. Over time, high concentrations of salt evaporating can erode soft stone coping or corrode metal hardware. To combat this:
- Rinse Regularly: Every few weeks, take a moment to hose down the area immediately around your pool, rinse the exterior of your pool liner, and thoroughly flush automatic pool cover metal tracks and hardware with fresh water. This simple act washes away salt residue before it can cause damage.
Combating Calcium Buildup (White Flakes):
If you see white flakes in your pool water, don't panic – it's almost certainly calcium carbonate, not salt. This is a common issue with salt water generators and is often a byproduct of naturally high pH levels and scale forming on the salt cell. When your generator produces chlorine, it creates a localized high-pH environment inside the cell, which encourages calcium to precipitate out of the water. This is particularly noticeable when first starting a new generator. - Avoid Cal-Hypo Shocks: A critical preventative measure is to never use calcium hypochlorite (cal-hypo) shock in a salt water pool. This type of shock adds more calcium to your water, directly contributing to increased calcium hardness and exacerbating scale buildup on your salt cell and other pool surfaces. Instead, opt for a non-calcium-based shock like dichlor or liquid chlorine.
- Manage pH Aggressively: Since high pH accelerates calcium buildup and can also corrode pool equipment, diligent pH management is paramount. More on this in the "Water Chemistry Balance" section.
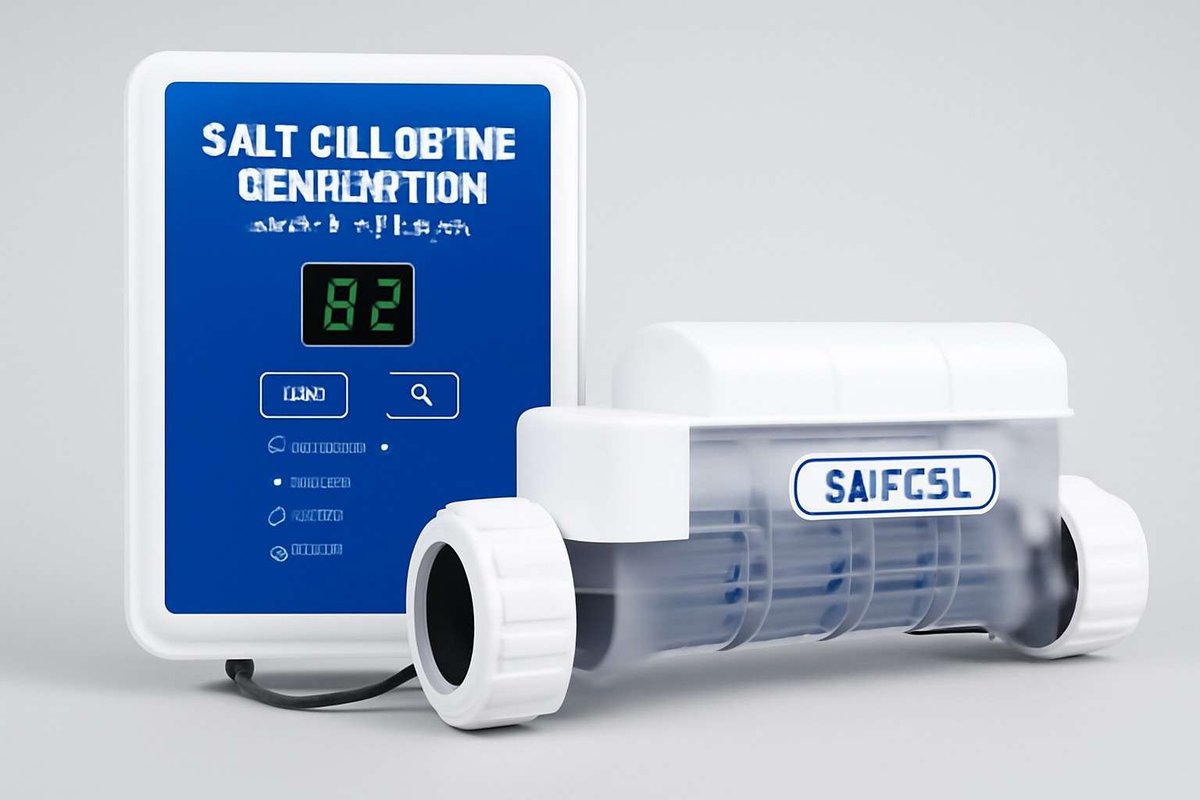
4. The Heart of the System: Salt Cell Inspection and Cleaning
Your salt cell is the workhorse of your entire system, and its condition directly impacts your pool's health. A high-quality salt cell is a significant investment and, with proper care, can last 3 to 7 years. Regular inspection and cleaning are crucial to maximizing its lifespan and efficiency.
Quarterly Inspection is Non-Negotiable:
At least every three months (or more frequently if you notice reduced chlorine output or white flakes in your pool), you should inspect your salt cell for calcium buildup. This buildup appears as white, flaky, or crusty deposits on the metal plates (the "blades" or "grids") inside the cell. High pH levels or warmer water temperatures can accelerate this scale formation.
- What to Look For:
- White, Flaky Deposits: This is calcium carbonate scale. It restricts water flow and reduces the cell's ability to produce chlorine.
- Blue or Green Buildup: This indicates high metal content in your water (e.g., copper, iron) or, in some cases, a sign of a failing cell. If you see this, test your water for metals.
How to Inspect Your Salt Cell:
- Safety First: Turn off the power to your pool pump and the salt chlorine generator at the breaker.
- Remove the Cell: Carefully disconnect the salt cell from the plumbing according to your manufacturer's instructions.
- Visual Check: Look inside the cell at the metal plates. Are they clean and clear, or do you see white, flaky deposits?
- Reassemble (if clean): If there are no noticeable deposits, reassemble the cell and restore power.
Cleaning Your Salt Cell (When Scale is Present):
If you find calcium scale, it's time for a gentle acid wash. This process needs to be done carefully to protect yourself and the cell. - Power Down & Remove: Shut off all power to your pool system, then remove the salt cell.
- Rinse Debris: Hose off the inside of the cell to remove any loose debris, bugs, or larger pieces of scale.
- Prepare Your Acid Solution: Always wear protective gear: goggles, chemical-resistant gloves, and closed-toed shoes. In a well-ventilated area, prepare a diluted muriatic acid solution or use a safer alternative like Acid Magic. Always add acid to water, never water to acid, to prevent dangerous splashing. Follow the manufacturer's recommendations for dilution ratios (typically 1 part muriatic acid to 4-5 parts water).
- Soak the Cell: If your cell came with a cleaning stand, use it. Otherwise, cap one end of the cell and place the open end in a plastic bucket (never metal). Carefully pour the acid mixture into the cell until the plates are fully submerged.
- Watch for Bubbles: Let the cell soak. You'll see bubbling as the acid reacts with the calcium scale. For light buildup, 2-5 minutes might be enough. For excessive buildup, it could take 10-15 minutes, but never leave it soaking longer than necessary – stop when the bubbling largely ceases.
- Rinse Thoroughly: Carefully remove the cell from the solution. Properly dispose of the acid solution (check local regulations; often it can be slowly poured into the pool water, which will lower pH, but verify this is safe for your pool type). Rinse the inside and outside of the cell thoroughly with fresh water.
- Reinstall: Reassemble the cell, connect it to your plumbing, and restore power to your pool system.
Important Considerations for Acid Cleaning:
Limit how often you chemically clean your salt cell. Frequent acid use can strip the protective coating from the cell's plates, shortening its lifespan. Aim for cleaning only when necessary, typically once or twice a year, or when scale is clearly visible. And remember, never pour leftover acid solution onto the ground or down household drains.
5. Mastering the Chemical Dance: Balancing Your Pool Water
Maintaining balanced water chemistry is perhaps the most critical ongoing task for any pool owner, but salt water pools have specific nuances. Salt water generators naturally produce high pH, meaning you'll be actively managing this particular parameter more often. Also, relying solely on generator readings for chlorine can be misleading; manual testing is key.
You'll test certain parameters weekly, others monthly. Here's what to look for:
Free Chlorine
- Test Frequency: Weekly. Use a reliable liquid test kit (15-second test) or test strips.
- Target Level: Aim for around 3 PPM (parts per million).
- Action: If levels are low, adjust your salt chlorine generator's output setting upwards. If too high, lower the setting. Due to the even dispersal in a salt system, levels slightly higher than 3 PPM (e.g., 4-5 PPM) are generally acceptable and won't cause the same irritation as manually adding a high dose of chlorine.
pH Levels
- Test Frequency: Weekly.
- Target Level: Maintain between 7.4 and 7.6.
- Action: Salt water generators inherently raise your pool's pH. Levels above 7.6 can lead to eye and skin irritation, reduce chlorine effectiveness, and accelerate calcium scale buildup. Use a pH decreaser or muriatic acid to lower pH. To help manage this natural rise, limit your salt system's run times to no more than 10 hours daily if your pool can maintain chlorine output in that timeframe.
Salinity Levels
- Test Frequency: Manually test monthly during the pool season, and always after heavy rain, significant splash out, or when you've drained and added a large volume of fresh water.
- Target Level: 2,700 to 3,400 PPM (check your manual).
- Action: Use test strips or a digital salinity tester for accurate readings. Adjust with pool salt as needed (refer back to the "Getting Your Pool's Salinity Just Right" section).
The Big Three: Alkalinity, Stabilizer (CYA), and Calcium Hardness
These three parameters provide the foundation for stable water chemistry and should be tested monthly.
- Total Alkalinity (TA):
- Ideal Range: 100-150 PPM.
- Nuance for Salt Pools: Since salt water pools tend to run with higher pH, slightly lower alkalinity (e.g., around 80-100 PPM) is often acceptable, as it can make pH management a bit easier without compromising overall stability. Alkalinity acts as a pH buffer.
- Cyanuric Acid (CYA/Stabilizer):
- Ideal Range: 30-50 PPM.
- Nuance for Salt Pools: CYA protects chlorine from degradation by the sun's UV rays. Some salt water pool owners find that maintaining CYA closer to 80 PPM helps extend the life of the chlorine produced by their generator, especially in very sunny climates. Be careful not to exceed this, as very high CYA levels can "lock up" chlorine, rendering it ineffective.
- Calcium Hardness:
- Ideal Range: 200-400 PPM.
- Critical for Salt Pools: While essential for preventing plaster etching, high calcium hardness (above 400 PPM) significantly increases the risk of calcification, particularly on your salt cell and other pool equipment.
- Action for High Levels: If your calcium hardness is too high, the only effective way to lower it is by partially draining your pool and diluting the remaining water with fresh, lower-calcium water. Remember, avoid cal-hypo shocks!
6. The Weekly Reset: Shocking and Cleaning Your Pool
Even with a constantly generating chlorine system, your pool benefits from a weekly boost and thorough physical cleaning.
Weekly Pool Shocking:
Shocking (superchlorinating) your pool weekly, or after heavy use, a big party, or a storm, is vital. It oxidizes organic contaminants, kills algae and bacteria that might have resisted regular chlorine levels, and helps "refresh" your free chlorine by breaking down chloramines.
- Using Your Generator's Boost: Most salt chlorine generators have a "boost" or "superchlorinate" setting. This temporarily ramps up chlorine production for 24-72 hours. It's often sufficient for a routine weekly shock.
- Alternative Shocks: If you need a more powerful oxidizing agent or your generator can't keep up, use a dichlor-based stabilized chlorine shock. This adds chlorine without calcium and provides some additional CYA, which you'll need to monitor to stay within your target range. Again, never use cal-hypo shock in a salt water pool.
- Post-Shock Balance: After shocking, let your pool circulate for at least 24 hours. Then, retest and rebalance your chemicals before allowing swimmers back in.
Skim, Brush, and Vacuum Every Week:
This is the grunt work that keeps your pool physically clean and reduces the chemical load. - Skimming: Use a skimmer net daily (if possible) to remove leaves, bugs, and other floating debris before they sink and decompose.
- Brushing: At least once a week, thoroughly brush all pool surfaces – walls, floor, steps, and especially the tile line. This dislodges algae spores, dirt, and prevents the buildup of deposits, allowing your filter and chemicals to work more effectively.
- Vacuuming: Weekly vacuuming removes settled debris. You can use a manual pool vacuum, an automatic pool cleaner, or invest in a robotic pool cleaner for hands-off convenience. Consistent physical cleaning reduces the amount of organic material your chlorine needs to break down, saving wear and tear on your generator.
7. Beyond the Basics: Pro Tips for Salt Pool Longevity
While a salt water pool is generally considered easier to maintain than a traditional chlorine pool (since the generator handles daily chlorine production), it absolutely requires vigilance over the salt cell and overall generator condition.
- Professional Generator Service: While you'll handle salt cell inspection and cleaning as a homeowner, consider scheduling regular professional service for the entire salt chlorine generator unit itself. This ensures all electrical components, flow sensors, and connections are in optimal working order.
- High Salinity Warning: Be mindful of excessively high salinity levels. If your pool water reaches 5,000 PPM or higher, it poses a risk of corrosion to pool equipment and can cause your generator to malfunction or even fail prematurely. If you ever find your salinity this high, the solution is to partially drain the pool and dilute the water by adding fresh water.
- Essential Chemicals for Your Arsenal: Keep these on hand:
- Pool Salt (for refills)
- Chlorine Stabilizer (Cyanuric Acid)
- pH Decreaser or Muriatic Acid
- Calcium Hardness Increaser (if needed, but sparingly)
- Various Shocks (non-chlorine, dichlor-based, or liquid chlorine)
- Consider Salt System Additives: Certain pool additives are designed specifically for salt systems. These can help protect and extend the life of your salt cell by removing phosphates, organics, and actively preventing scaling, acting as an extra layer of defense against calcium buildup. When considering a salt generator for your pool, remember that these maintenance steps are key to unlocking its full potential and lifespan.
Your Path to a Perfectly Clear Salt Water Pool
Maintaining your salt chlorine generator and pool water chemistry might seem like a lot of steps at first, but it quickly becomes second nature. By consistently monitoring your water balance, especially pH and salinity, and giving your salt cell the attention it deserves, you'll ensure your generator operates efficiently and your water stays inviting.
Embrace the routine, pay attention to the details, and you'll spend less time troubleshooting and more time enjoying the soft, irritation-free water that only a well-maintained salt water pool can offer. Happy swimming!